I have a large collection of cast iron. It used to be the only thing I cooked in. I use some other pots and pans now too, but I still love my trusty cast iron. When seasoned properly they are WAY better than any non-stick cookware you’ll ever find.
1. First wash your pot in hot, soapy water. This is the ONLY time you will use soap on your cast iron. Dry it completely.
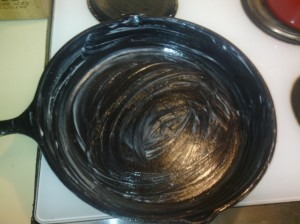
2. Rub a thin coating of shortening on the inside and outside of the pot. I use a zip top bag as a glove, but you can use any soft cloth or paper towel too.

3. I put the pot upside down in a cold oven. Be sure to put it over a cookie sheet to catch any drips. Turn the oven on to 350 degrees F and let it bake for an hour. After one hour, turn the oven off and let the pot cool in the oven.

4. After my pot had mostly cooled I took it out of the oven. The inside didn’t look quite as shiny as I wanted, so I sprayed it down with some pan spray and gently wiped it out. Now it’s just cooling down for me before I put it away. 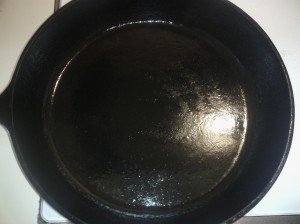
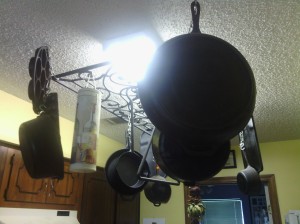
It is very important to store your cast iron in such a way that air can circulate around it. A lot of folks store them in their oven or in the drawer just under if you have one. I have this cast iron wall hanging that I got from Garden Ridge years ago that I use to hang my pots on. They are seriously bolted into the rafters about 4 inches or more.
Cooking with cast iron is very easy, but there are a few things to remember.
- Always pre-heat your pan pretty good before you put anything into it. I usually spray a little pan spray or drizzle some olive oil into it each time I am going to cook as I’m pre-heating it.
- Cast iron gets VERY hot so I almost never put it on high heat. I use med-hi as the highest setting and then after it’s heated well I lower the temperature to medium.
- Never put hot cast iron into the sink. Let it cool at the stove for awhile. You may crack it if the temperature change is too severe. I had this happen once. I was NOT a happy girl. A well-meaning person was helping out with the dishes.
- Never put it into a dishwasher or use soap or any dish washing detergents. It will strip away all of the seasoning you just did and you’ll have to do it again. I just use some nice HOT tap water and a scrubby brush. For hard to remove food or grease build up you can use steel wool, and SOS pad or even sand paper to get it off, but you’ll have to cure it again (re-season it).
- After you have cleaned your pot with hot water and a scrubby, then dry it completely and lightly spray it with some pan spray. I usually wipe it down with a paper towel after that too just to keep it from being too runny.
If you have a pot that is completely rusted it is still salvageable! I actually found one of my favorite oblong roasting pans at a yard sale for $3. It was orange and rusty, but still solid. I took it home and cleaned it as best I could…which didn’t do much. Then I put it in the oven and turned the oven on the self-clean cycle. After the cycle was finished I carefully took the cooled pot outside and knocked the rust off over the garbage can. Almost all of it was gone! Then I cleaned it again and seasoned it. Now that is one of the best pots I have and I wouldn’t part with it. 🙂