Food Waste Friday 8/9/2013

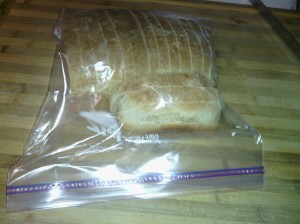
FoodWasteFriday  This week I so wanted to have a “no waste” week. I wasn’t fully successful, but I’m not too disappointed with my efforts. I had to throw away some cherry tomatoes that were icky and a couple of slices of home made bread that smelled sour when I took them out of the bag. Some small eggplants from the garden may not make it. I’m going to try to use them today. A small amount of buttermilk that was out dated and a small amount of milk that was out dated. We really should have used that up! We were really good about using up several leftovers this week. How did you do with your food waste?

If you are interested in helping to do your part in not wasting food, join us and The Frugal Girl . You can even get her nifty logo to link up with her. 🙂 Just click the logo above.

How to make your own Vanilla Extract

How to make your own Vanilla Extract

Some people use vanilla extract in passing. Some people use it like it’s going to go bad tomorrow. I’m the latter. Since I’ve started making my own vanilla yogurt and homemade granola I am using more vanilla extract up than I really thought possible. So, I thought that it would probably be prudent to just make it myself and save a fair amount of money. 🙂
To buy an “inexpensive” store brand 2 oz. bottle of vanilla extract I recently spent $5.49.
Today I spent $8.79 on the vanilla beans and $13.26 on a 750M bottle of Fris Vodka. Which is the least expensive bottle I found at our local package store. Total = $22.05.
750M is about 26 oz. So, let’s do the math. (I am a math teacher after all. 😉 ) If I bought 26 oz. of vanilla extract at $5.49/2 oz. then I would spend $71.37!!!! OMG So, basically I am saving $49.32 making my own.

Steps to saving nearly $50.

IMG_20130802_164250

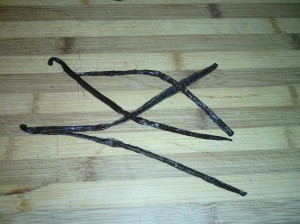
  • Select an inexpensive bottle of vodka and some vanilla beans. The recommended ratio is 3 beans per cup of vodka. I only have 2 beans, so I may go get some more to add to the bottle.
  • Slice the beans in half length wise to expose all of the yumminess inside.IMG_20130802_164646
  • Add the beans to the bottle and shake it up. At least once a week give the bottle another shake. After 2 months it should be ready to use. You can see the little flecks of vanilla floating after I shook the bottle up here.IMG_20130802_164847

I think I can handle that! 🙂 I added a label so that nobody would think this was available for evening cocktails.

Food Waste Friday…Not too bad this week.

FoodWasteFriday I had a better week than last week on the food waste front.

Thrown Away:

  • a little lettuce from the garden
  • a little tuna salad that didn’t get eaten
  • a few slices of homemade bread that started to mold
  • some cherry tomatoes from the garden
  • a little milk that was out of date

Saved:

  • Some really ripe bananas were sliced and topped with peanut butter for a snack
  • Some left overs were eaten up

How did you fare this week with food waste?

How to season Cast Iron

How to season Cast Iron

I have a large collection of cast iron. It used to be the only thing I cooked in. I use some other pots and pans now too, but I still love my trusty cast iron. When seasoned properly they are WAY better than any non-stick cookware you’ll ever find.

1. First wash your pot in hot, soapy water. This is the ONLY time you will use soap on your cast iron. Dry it completely.

2. Rub a thin coating of shortening on the inside and outside of the pot. I use a zip top bag as a glove, but you can use any soft cloth or paper towel too.

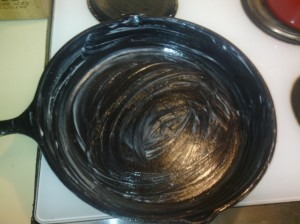
IMG_20130801_172506

IMG_20130801_172551

3. I put the pot upside down in a cold oven. Be sure to put it over a cookie sheet to catch any drips. Turn the oven on to 350 degrees F and let it bake for an hour. After one hour, turn the oven off and let the pot cool in the oven.

IMG_20130801_172807

4. After my pot had mostly cooled I took it out of the oven. The inside didn’t look quite as shiny as I wanted, so I sprayed it down with some pan spray and gently wiped it out. Now it’s just cooling down for me before I put it away. IMG_20130801_190240
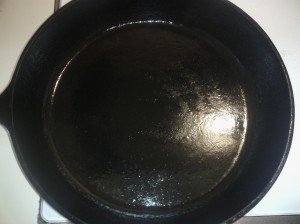
It is very important to store your cast iron in such a way that air can circulate around it. A lot of folks store them in their oven or in the drawer just under if you have one. I have this cast iron wall hanging that I got from Garden Ridge years ago that I use to hang my pots on. They are seriously bolted into the rafters about 4 inches or more.

IMG_20130801_172406

Cooking with cast iron is very easy, but there are a few things to remember.

  1. Always pre-heat your pan pretty good before you put anything into it. I usually spray a little pan spray or drizzle some olive oil into it each time I am going to cook as I’m pre-heating it.
  2. Cast iron gets VERY hot so I almost never put it on high heat. I use med-hi as the highest setting and then after it’s heated well I lower the temperature to medium.
  3. Never put hot cast iron into the sink. Let it cool at the stove for awhile. You may crack it if the temperature change is too severe. I had this happen once. I was NOT a happy girl. A well-meaning person was helping out with the dishes.
  4. Never put it into a dishwasher or use soap or any dish washing detergents. It will strip away all of the seasoning you just did and you’ll have to do it again. I just use some nice HOT tap water and a scrubby brush. For hard to remove food or grease build up you can use steel wool, and SOS pad or even sand paper to get it off, but you’ll have to cure it again (re-season it).
  5. After you have cleaned your pot with hot water and a scrubby, then dry it completely and lightly spray it with some pan spray. I usually wipe it down with a paper towel after that too just to keep it from being too runny.

If you have a pot that is completely rusted it is still salvageable! I actually found one of my favorite oblong roasting pans at a yard sale for $3. It was orange and rusty, but still solid. I took it home and cleaned it as best I could…which didn’t do much. Then I put it in the oven and turned the oven on the self-clean cycle. After the cycle was finished I carefully took the cooled pot outside and knocked the rust off over the garbage can. Almost all of it was gone! Then I cleaned it again and seasoned it. Now that is one of the best pots I have and I wouldn’t part with it. 🙂

Swagbucks


If you are like me and trying to be frugal with your resources you may be interested in trying out Swagbucks. I heard about them from one of the other blogs I follow TheFrugalGirl. I’ve been using the site for about a month now and I’ve earned enough Swagbucks to get $20 worth of Amazon gift cards. I have been eyeing a set of Pyrex glass storage containers and am planning to put that towards it. 🙂 If you haven’t signed up for Swagbucks yet, I’d love it if you’d use my referral link embedded into my post here to give them a try and let me know what you think.  Swagbucks gives you even more swagbucks when you have referrals, so after you sign up if you like it, you can invite your friends to sign up and you’ll earn too. They have not paid me to endorse them or anything, I’m just sharing the love. I will however hopefully earn some swagbucks while YOU’RE earning swagbucks.

How to turn a fat 8 year old cat into a kitten over night

How to turn a fat 8 year old cat into a kitten over night

Since I’ve taken up knitting these past few days my dog Daisy has decided I’m boring and whines at me constantly. My cat, Annie, on the other hand thinks this is just marvelous! She loves to sit near me and bat at the knitting needles and yarn. I had to make her a little ball of yarn to play with so she’d leave me be. Daisy promptly stole it from her and shredded it.
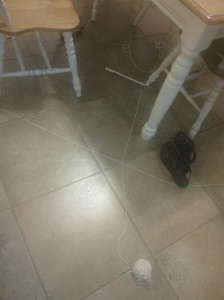
So, last night I put my knitting aside on the table like I’ve been doing. (My pattern is on the computer, so I just keep them together.) And when I woke up, I was greeted with yarn in the living room, wrapped around the coffee table. I followed the yarn into the dining room.

IMG_20130723_064008

Wow! now that is an impressive display of kitty naughtiness right there. It’s hard to tell as this picture was taken on my phone, but the yarn has even gone over the rungs under one of the chairs.

IMG_20130723_064116

I thought at first that she had managed to unravel my knitting too, but I spotted the needle under the table.

IMG_20130723_064031

Annie, the guilty party. She looks possessed here. LOL

I’ve come up with a temporary solution to save my yarn from my cat…

IMG_20130723_115641

an overturned pie plate covers it up. Annie is looking on really irritated. Hey, she’s not even supposed to be on the table to start with! Get down!

A Shameful Waste

FoodWasteFriday This is my first week participating in the Food Waste Friday (albeit a day late). I was really dreading my confession time. I had to throw out a lot of things…though I did have some good saves too.

Thrown out:

2 cabbages that had soured, a small bag of collards, a couple of small eggplants, 2 tomatoes and a handful of cherry tomatoes (all these from the garden). I also  threw away 1/2 a container of salsa that I’d gotten from Sam’s Club that we didn’t care for, some black bean and corn salsa that I’d been eating on for a week, 1/2 a jar of homemade strawberry syrup that looks like a spot of mold got on it, 1/2 a carton of whipping cream (out of date), 2 slices of Swiss cheese that were suspicious, and worst of all 2 quarts of home made yogurt that is too grainy because I overheated the milk. *sigh* 😦 It’s shameful all this waste!

Saved:

A very ripe tomato was sliced and added to dinner plates one night, a couple of very ripe bananas were topped with peanut butter for a snack, some salad lettuces from the garden were on the verge of going that were saved by having dinner salads, some black beans were frozen for later use, some home made rolls were processed into bread crumbs and frozen for later use. Some celery was diced and frozen for later use. I did use up 2 flour tortillas by making breakfast burritos one morning.

This is bound to be the worst Food Waste Friday I’ll have…I know I can do WAY better than this. If you would like to participate in Food Waste Friday, click on the logo above to get the html code to add to your blog…or just tell us about it here in the comments. 🙂

How to make a crocheted dish cloth (not!)

How to make a crocheted dish cloth (not!)

I picked up a cute skein of cotton yarn yesterday at Goodwill for $.59. I figured this was plenty to make a couple of crocheted dish cloths. So, I googled “free crochet dish cloth patterns” and found a really cute nubby dish cloth. All it really required was some single crochet and treble crochet. Not a problem. I haven’t crocheted in awhile, but it’s just like riding a bike…you never really forget how.
Except…mine looks like a trapezoid. :/ I unraveled it and tried again…still a trapezoid.
So…on to Plan B. I googled “free beginner’s dishcloth pattern” and found one that it just single crochet. Surely I can’t mess that one up! Hopefully…

IMG_20130719_110957

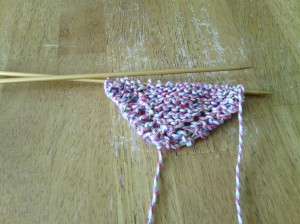
Okay…after this dishcloth became trapezoidal in nature 1/2 way through, my sister suggested knitting one. So, I got out the knitting needles and pulled up a beginning pattern for that. It’s been oh…probably 23 or more years since I’ve knitted. (What?!)

After a very nice tutorial http://www.queenofdiy.com/stitchery/knitting-beginners-guide.html I felt that I could try again….and again…and one more time…ugh!!! Okay one more try…so far this one is going pretty darn good…please Lord don’t let me drop a stitch!

IMG_20130719_132545

Update on the “Day of the Dishcloth”. After several video tutorials on everything from adding yarn to yarn tension, and casting off…SUCCESS!!! 😀

IMG_20130719_215944

How to make a Hobo Style purse

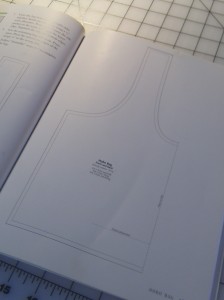
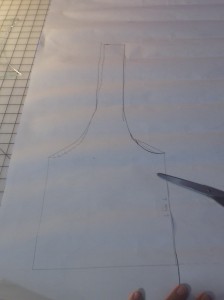
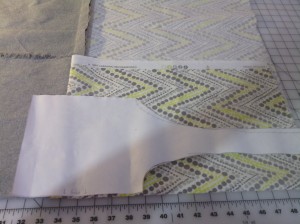
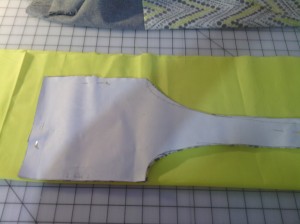
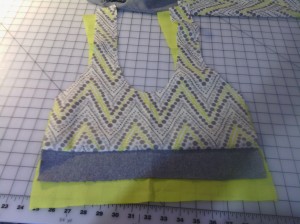
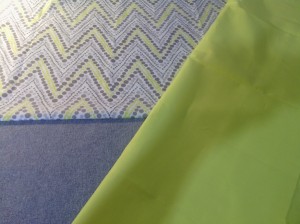
How to make a Hobo Style purse A friend of mine messaged me with pictures of some cute fabric that she was just dying to make into a hobo style bag. She came over later that night and together we made it! 🙂 IMG_20130713_182901We did find a pattern for a purse in one of my books here at the house, but unfortunately it had to be enlarged 167%. I tried to do this on my copy machine, but that didn’t really work out. So…Plan B! I drew one on the back of some large paper that I had and cut it out. IMG_20130713_184232   IMG_20130713_184241   We decided that the gray fabric would make a great bottom and that it might be easier to cut the pattern out if it were already attached to the focus fabric, so I went ahead and sewed those two pieces together. Then I laid the pattern on the fabric and positioned it along the fold like it showed in the book. After I pinned it in place I cut it out. I later realized that I had to do this twice for the front and back pieces. IMG_20130713_184730Next I had to cut out two pieces of the yellow for the lining of the purse. IMG_20130713_185059 The directions in the book weren’t very clear about the next steps, so here’s where I kind of had to finesse it a bit and just go with my instinct. IMG_20130713_185743 I put the lining and the outside of the purse together and kind of folded it in to get a picture in my head of what it was going to look like. I decided to sew the handles of the purse together and then with wrong sides together sew around the outside of the sides and handles. IMG_20130713_185347IMG_20130713_192350   I pressed it afterwards and then pressed a 1/4″ seam for the arm hole so that I could sew it down with a top stitch. Not super easy, but it got the job done. Just to give it a more finished look I top stitched around both sides of the handles. *The 2 halves of the purse are not connected yet.* I repeated the handle process for the other half of the purse. I joined the 2 halves together at the side seams being careful to match up the gray bottom.IMG_20130713_190230   Next the pattern in the book said to make the bottom of the purse and then attach it. Again…not really clear directions, but after some consultation with my friend, we decided that if we cut some gray and coordinating fabric just a little smaller than the purse width and then about 5 1/2″ tall, that would be a good size. I just cut rectangles to start, but then eased the corners into an oval as much as I could. I later cut off the excess fabric and then zigzag stitched over the edges so that they would be finished like the rest of the bag. IMG_20130713_205009   IMG_20130713_204953   We were pretty pleased with it overall. 🙂
How to slice home made bread

How to slice home made bread

If you’ve ever attempted to slice home made bread and ended up with smooshed, too-thick slices, or too-thin slices then this post is for you.
I love to make home made bread. It’s far more delicious and healthy than store bought, not to mention much more cost effective. The only thing that ever really kept me from baking it more frequently was the slices. I wanted to be able to use it for sandwiches, toast, you know…normal bread things. But, somehow I always ended up with less than fabulous looking slices. And then, I discovered the best tool in my kitchen to use was my electric knife! Yay! 🙂
First you need to make sure that your bread is completely cooled. If you want to slice off a piece to butter right out of the oven, that’s ok, but for slicing the whole loaf…wait until it’s completely cooled.
To make sandwich slices line the knife up about the size that you recognize a store-bought slice to be, then zip through it. I like to start the slice and then hold the slice onto the loaf while you continue to slice. It keeps the bread intact a little better.

IMG_20130717_130649
Take your time and go through the whole loaf.

IMG_20130717_130910
I store mine in a gallon zip top bag. They are now ready for some amazing sandwiches! 😉